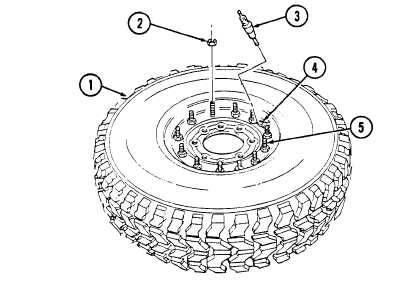
TM 9-2320-280-20-28-8. INNER RIM STUD MAINTENANCEThis task covers:a. Removalc. Installationb. Cleaning and InspectionINITIAL SETUP:ToolsGeneral mechanic’s tool kit:automotive (Appendix B, Item 1)ManualReferencesTM 9-2320-280-24PEquipmentConditionWheel removed (para. 8-3).GeneralSafetyInstructionsAlways wear eye protection when replacing wheelstuds.Ensure tire is totally deflated before removingwheel locknuts.Never use wheel assemblies with damaged studs.Never inflate a wheel assembly without firstchecking wheel locknut torques.Always use a tire inflation cage and a clip-on airchuck for tire inflation.W A R N I NGAlways wear eye protection when replacing wheel studs. Severe eyeinjury may result if metal chips contact eyes.NOTEPerform steps 1 through 4 for stud removal without disassembly ofwheel. Perform steps 5 and 6 for stud removal with disassembled wheel.1. Place wheel assembly in tire inflation cage.W A R N I NG2.3.In all assembly operations, ensure the tire is totally deflated beforeremoving wheel locknuts. Failure to follow proper safety precautionsmay result in serious injury or death.Remove valve core (3) from valve bore (4) and deflate tire (1). Run a wire through valve bore (4) toensure it is not plugged.When tire (1) is fully deflated, loosen wheel locknut (2) from each side of the broken stud(s) (5). Ifyou hear escaping air, do not proceed. Wait until the sound stops and recheck valve bore (4). Whenyou are certain tire is fully deflated, proceed to remove wheel locknut (2). Discard locknut (2).8-27
Please feel free to link to this site so that others can find it. It's easy to link to this site, just copy one of the texts below onto your web page: